Build your first DLLM application with Codex
Create a local chat application from ChatTemplate, use Codex to add a custom command, and run the updated application in DLLM Desktop. Japanese Coach is the example project; the same development cycle applies to your own personal workflow automation.
By the end, you will have a managed application that responds to /echo Hello
and a new /server-time command. You will also know how to review, commit,
push, and restart the application after each change. The Japanese-learning
feature at the end is an optional extension to this working starter.
DLLM Desktop provides the chat interface and manages the local application. ChatTemplate supplies the starting code; your application's code determines how it responds to messages and commands.
Before you begin
If DLLM Desktop is not installed yet, start with the setup instructions on the homepage, then return here to create your application.
This guide assumes that you have already:
- downloaded and opened DLLM Desktop; and
- installed the required local software, including Docker, Git, Python, and Conda.
The walkthrough also uses VS Code and its Codex extension to work on the application code.
You also need a Git-compatible repository service. Create a new empty
repository for this application before continuing. For this guide, call it
japanesecoach and copy its SSH URL, for example:
[email protected]:your-account/japanesecoach.git
An empty repository lets DLLM Desktop create the application files cleanly.
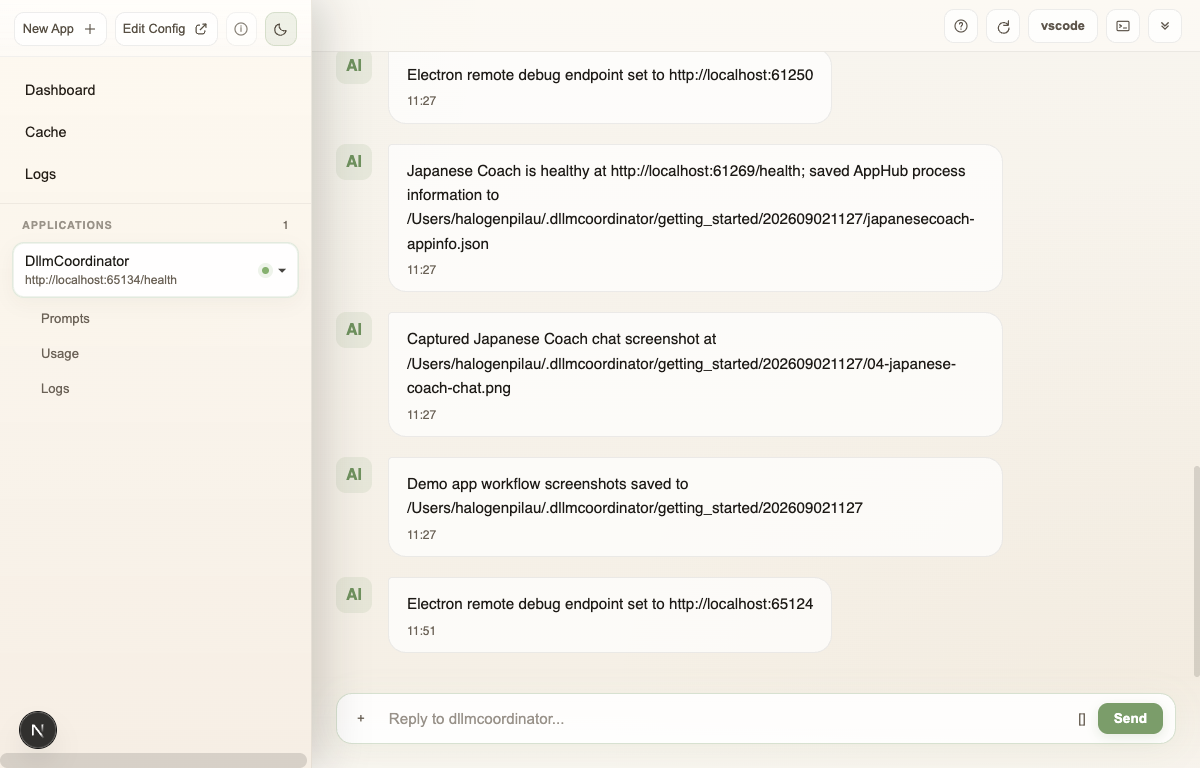
1. Open DLLM Desktop
Open DLLM Desktop and wait for its local workspace to be ready. The dashboard shows registered applications in the left-hand sidebar. Select New App + to create your first application.
2. Create the application from ChatTemplate
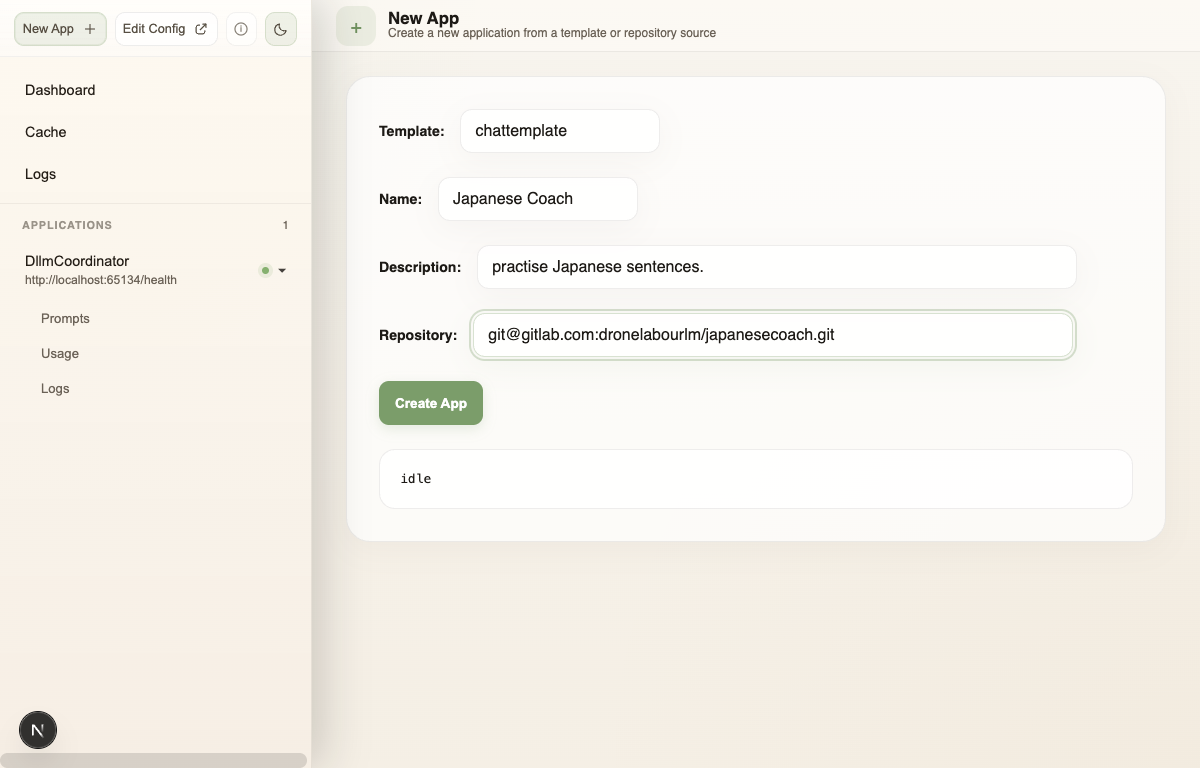
In New App, complete the form with the following values:
| Field | Value |
|---|---|
| Template | chattemplate |
| Name | Japanese Coach |
| Description | practise Japanese sentences. |
| Repository | The SSH URL of the empty repository you created |
Then select Create App.
3. Allow the project setup to run
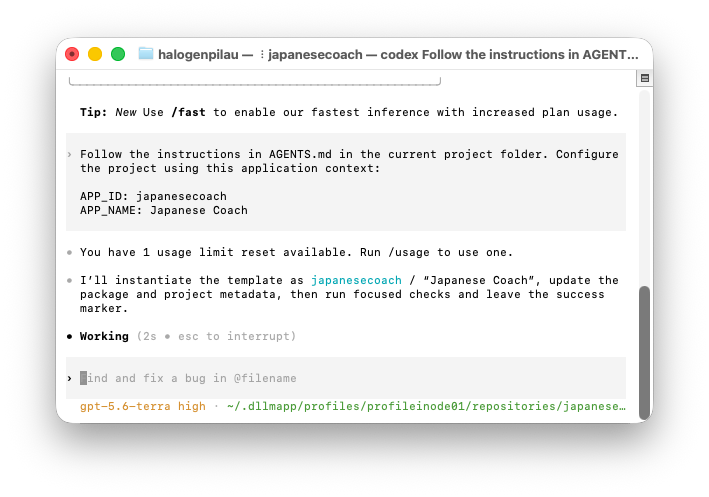
After you select Create App, DLLM Desktop opens a Codex terminal to set up the new project. When Codex asks for permission to access the project folder, select Yes to continue.
The setup renames and configures the template for Japanese Coach. Leave the terminal open and wait for it to finish; this can take a few minutes.
4. Confirm that the project was created
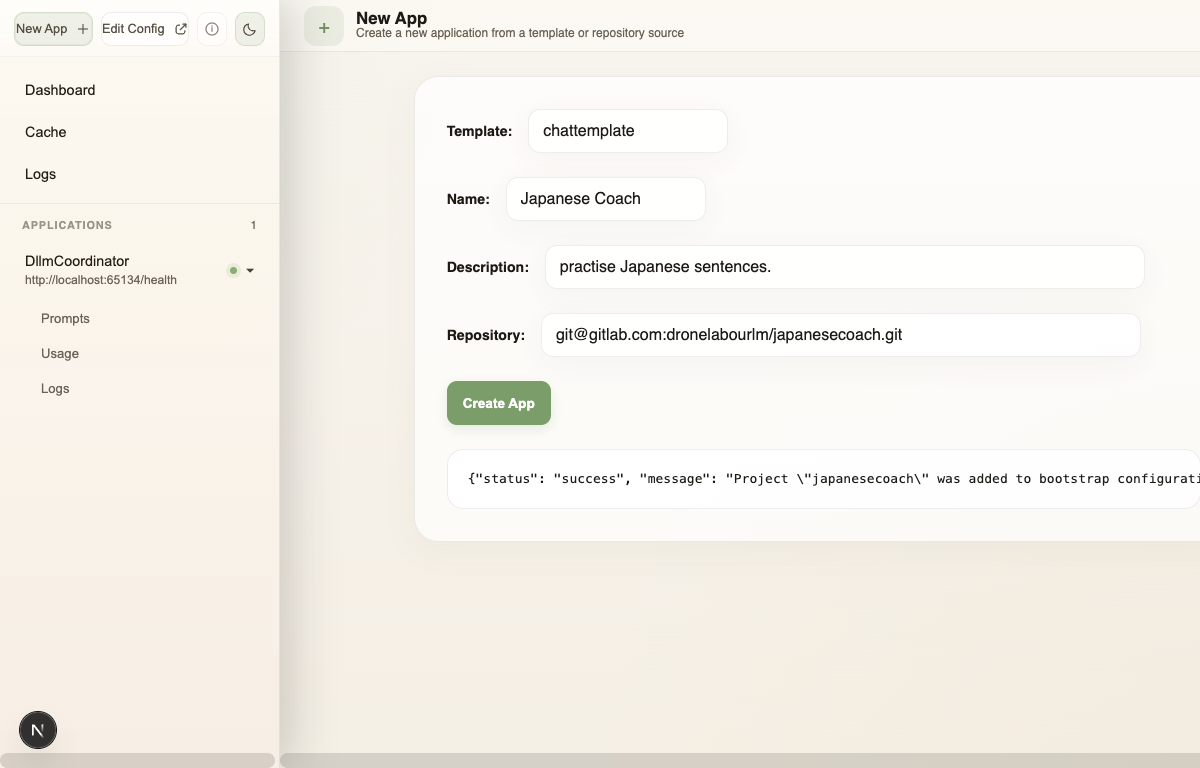
When the setup completes, DLLM Desktop shows a success message in the New App page. This confirms that Japanese Coach was added to the local bootstrap configuration.
5. Wait for Japanese Coach to start
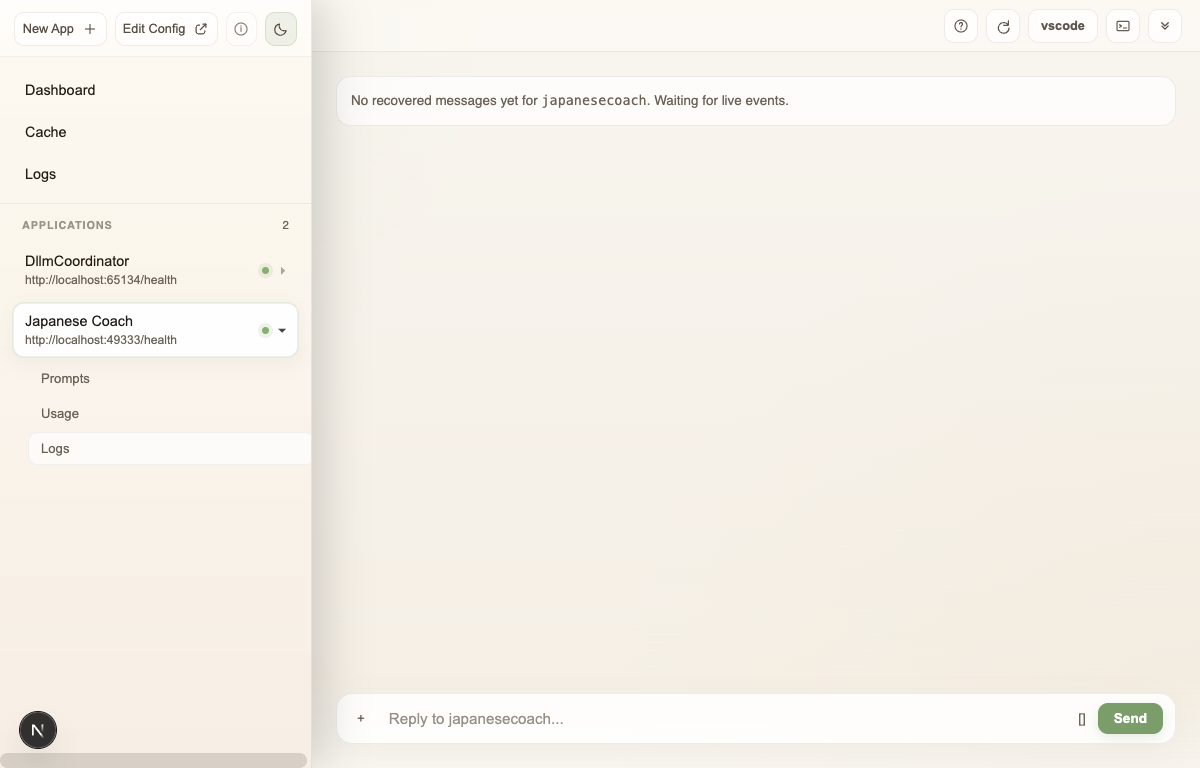
DLLM Desktop automatically reloads the application configuration and starts Japanese Coach. Wait a few minutes for the application to become available.
Japanese Coach then appears in the application list. You now have a managed local project that you can open in an agent coding tool and extend with the features needed for your work.
6. Check the starter application
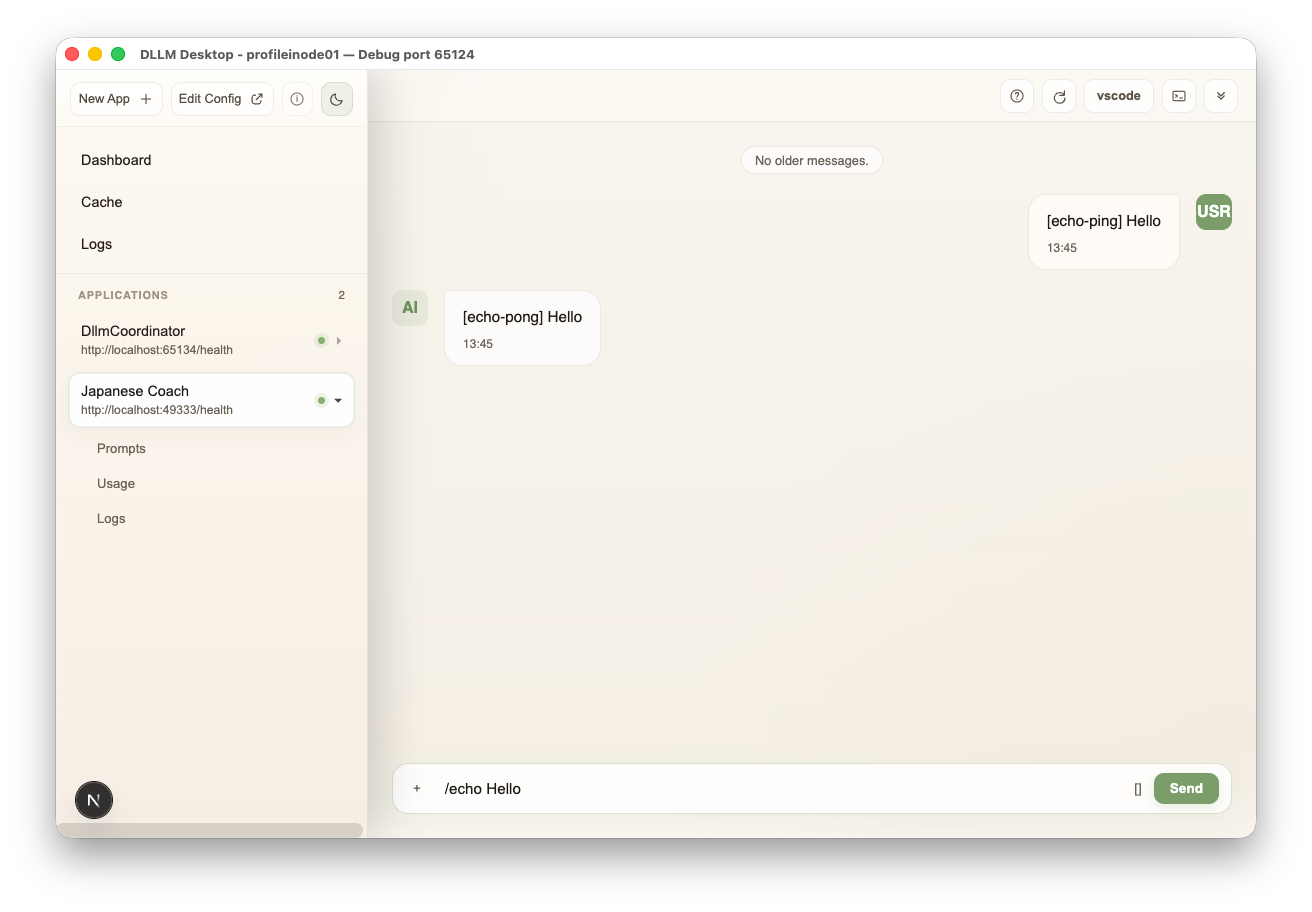
Japanese Coach includes a built-in echo command. In the chat, send:
/echo Hello
The application replies with [echo-pong] Hello. This confirms that the new
application is running and responding to chat messages.
7. Open the project in VS Code
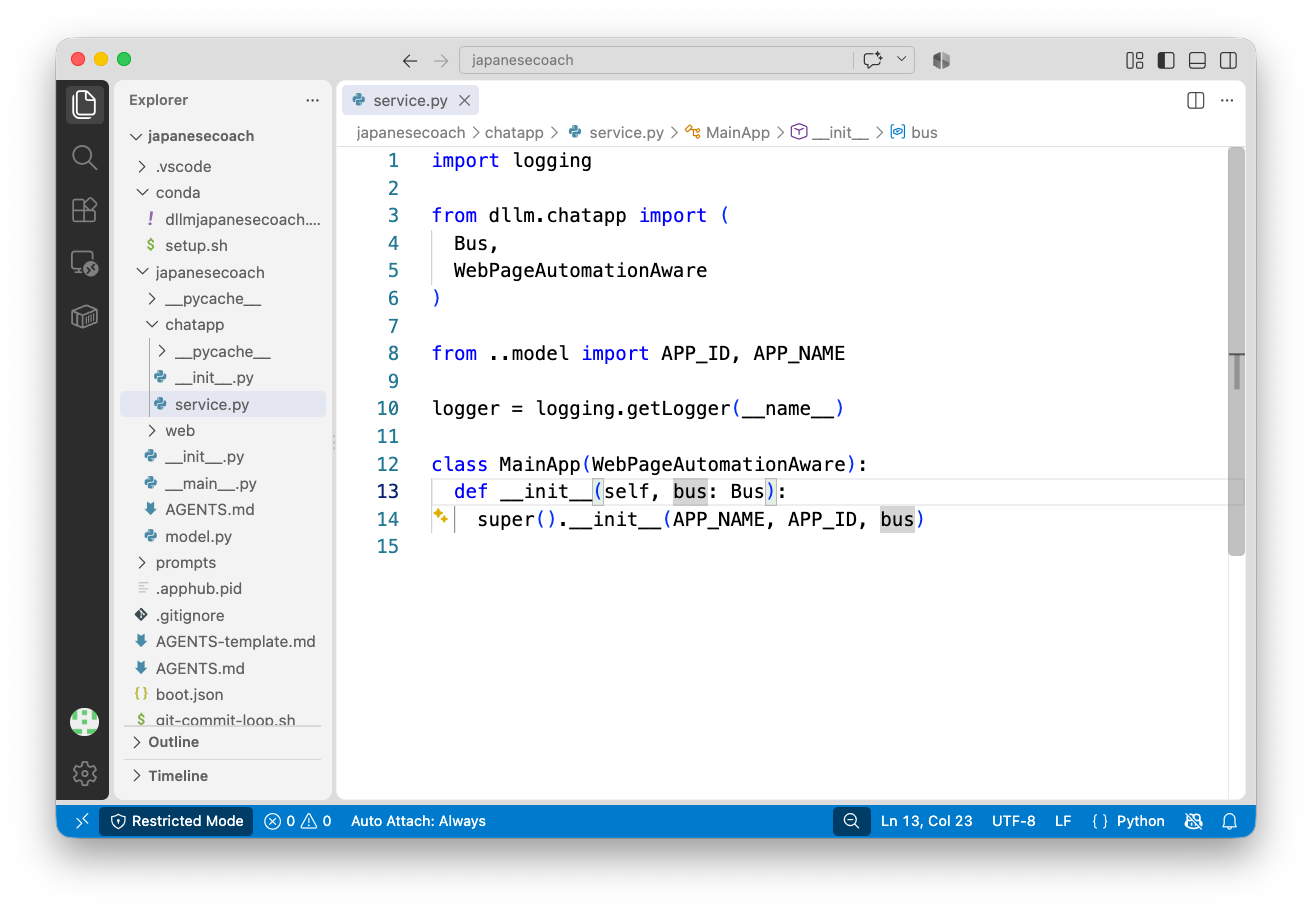
Select the vscode button at the top right of DLLM Desktop. It opens the
japanesecoach project directly in VS Code, with service.py open. This file
is the starting point for the application's code.
8. Trust the project folder
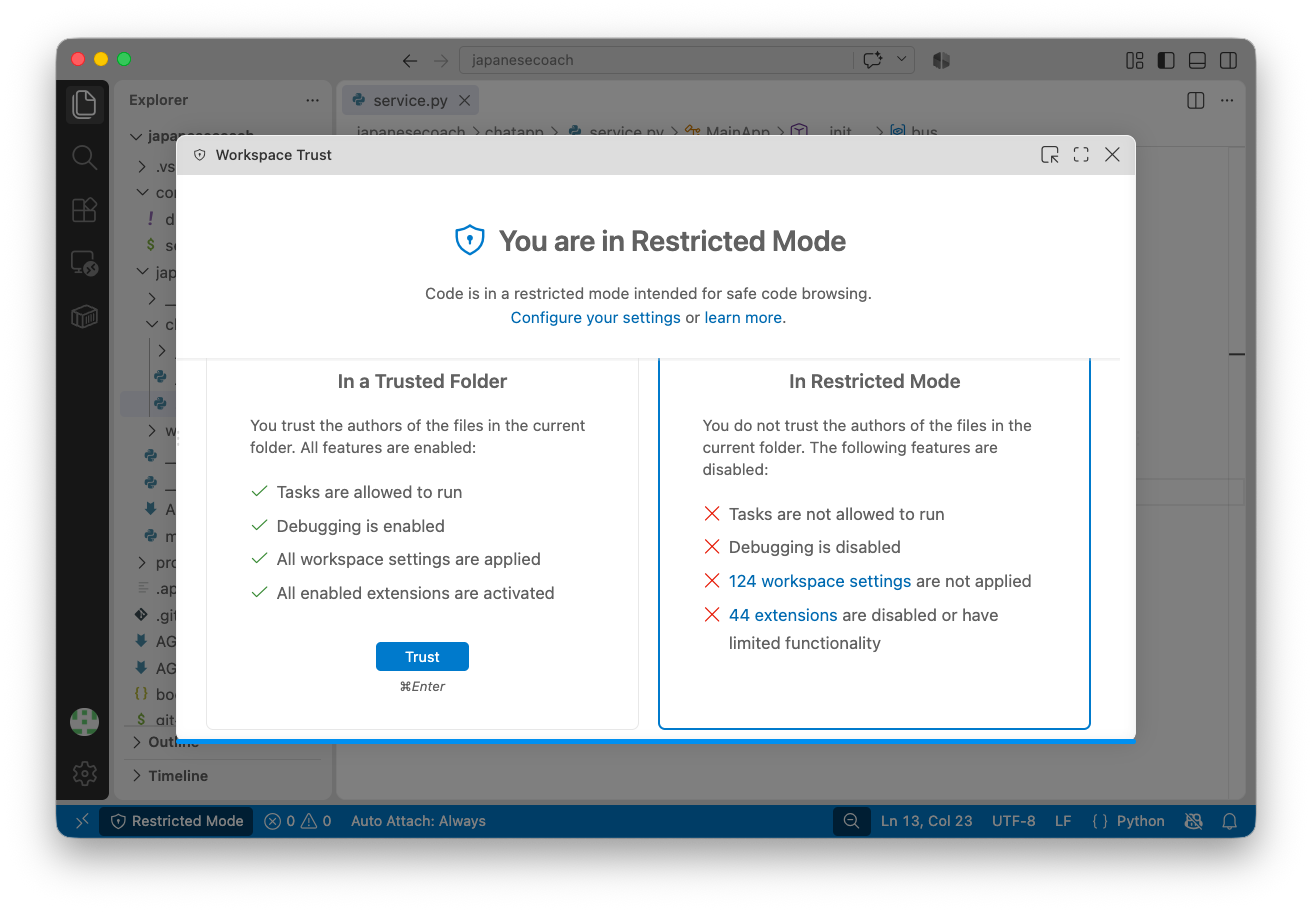
VS Code initially opens the project in Restricted Mode. Select Restricted Mode, then select Trust in the Workspace Trust dialog. Only trust a folder when it is the repository you created or otherwise recognise.
9. Select the project Conda environment
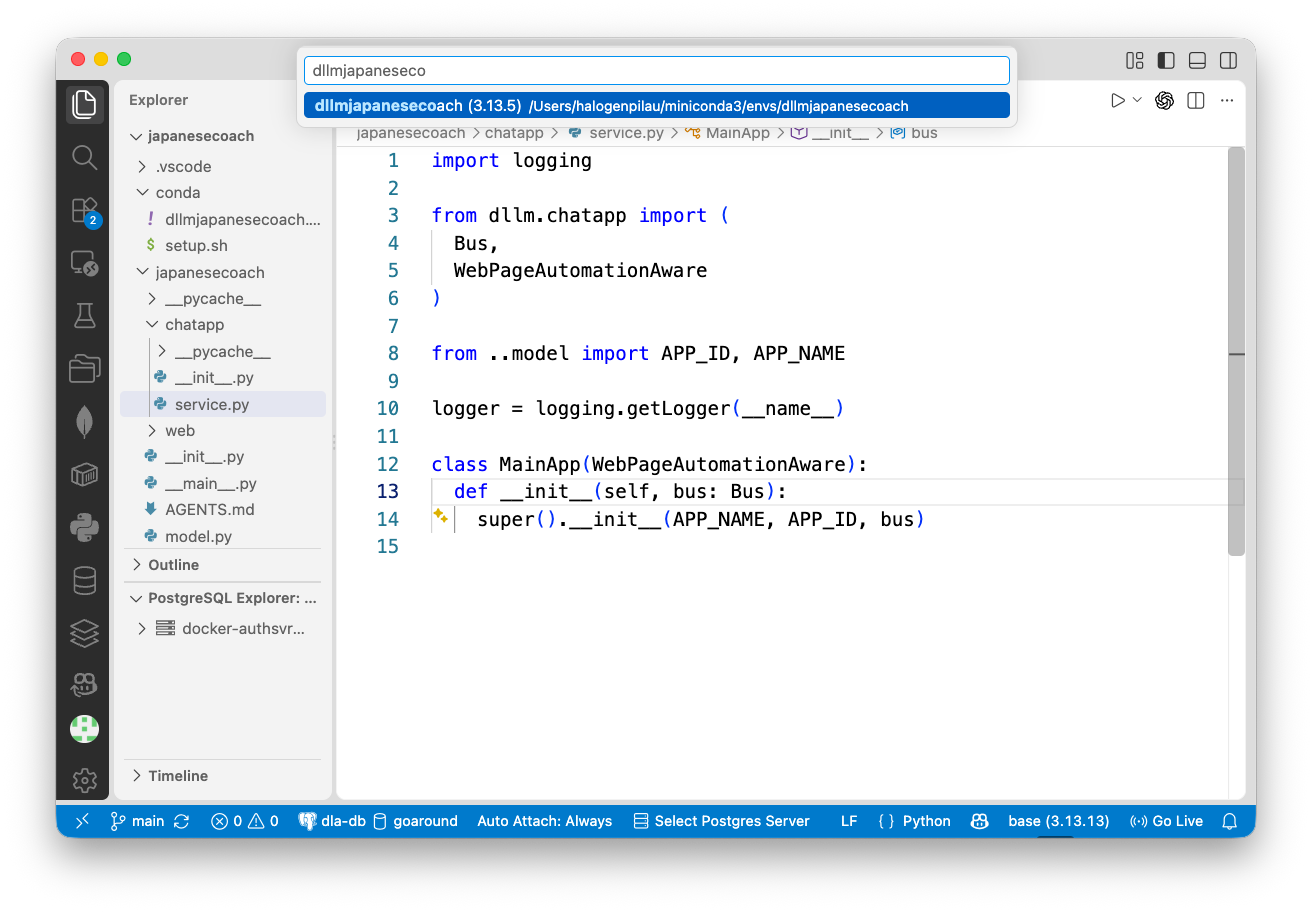
Use VS Code's Python environment picker to select
dllmjapanesecoach. DLLM Desktop creates this Conda environment during project
setup; selecting it lets VS Code use the project's Python dependencies.
10. Connect Codex to DLLM documentation
Codex does not include DLLM's application APIs by default. Add the DLLM documentation MCP server before asking it to change the project:
-
In the Codex extension, open the gear menu and select MCP servers.
-
Select Add server, then choose Streamable HTTP.
-
Use
dllm-informationas the server name and enter the following URL:https://www.dllmstack.com/mcp -
Save the server and restart the Codex extension.
You can enter /mcp in Codex to confirm that dllm-information is connected.
The project's AGENTS.md then tells Codex which DLLM documentation resources
to read when it needs to implement an application command.
11. Ask Codex to add a command
With the japanesecoach project open in Codex, describe the feature you want
in plain language:
add a command to return server time to user.
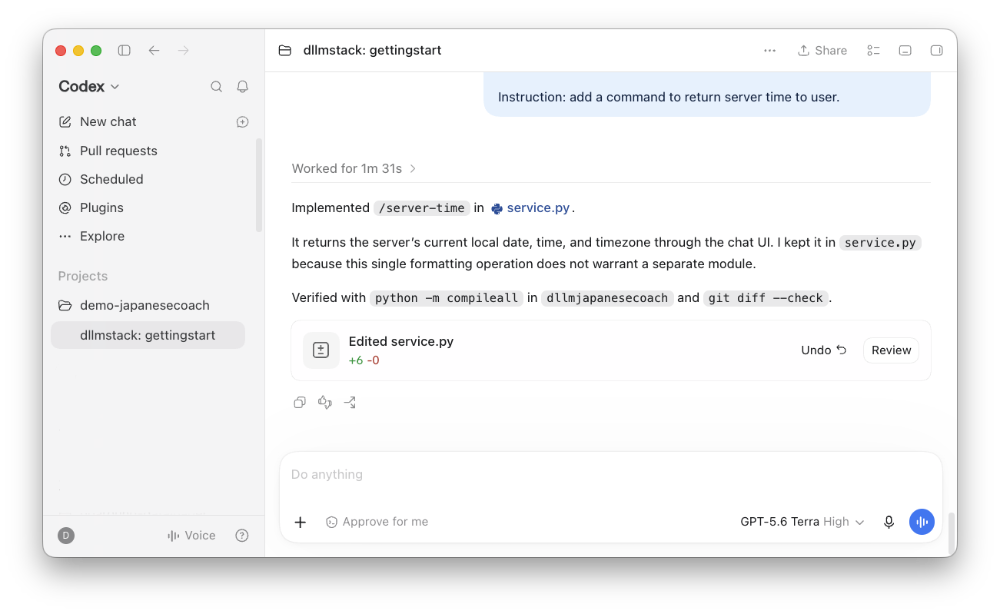
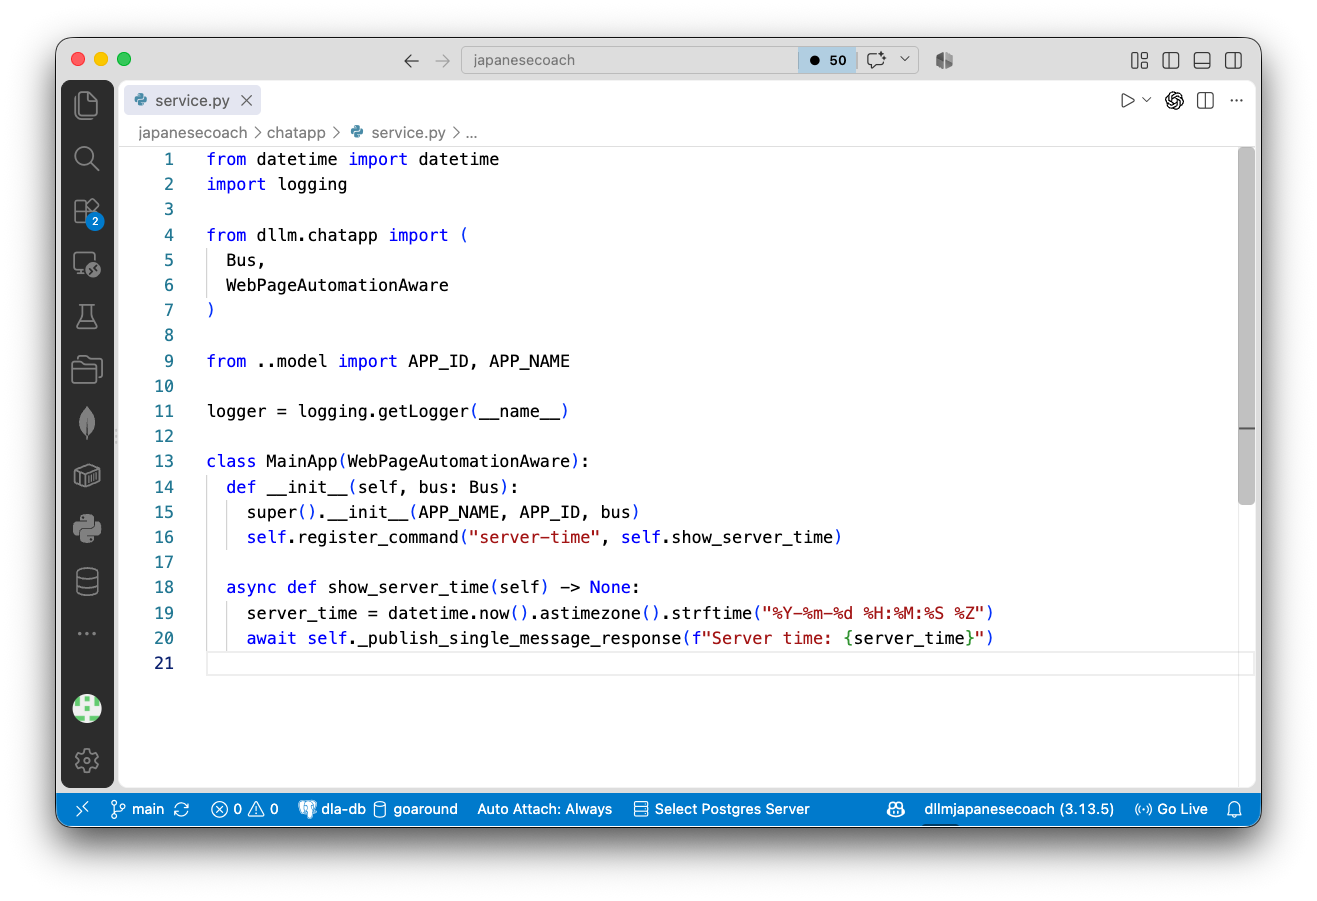
Codex updates the project for the requested feature. In this example, it adds
a server-time chat command in service.py that returns the current server
time. Review the resulting change before continuing or sharing it.
12. See why the new command is not live yet
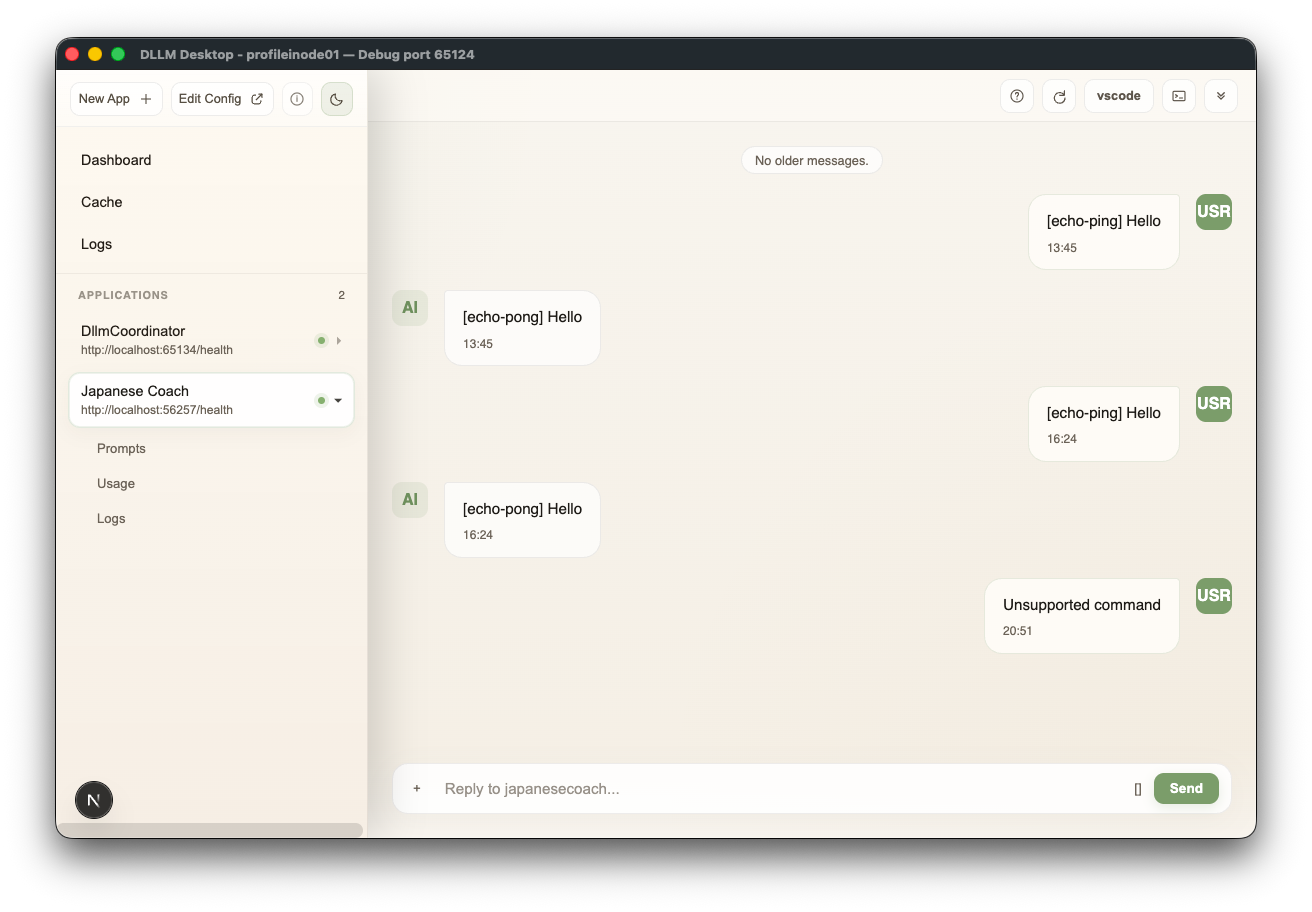
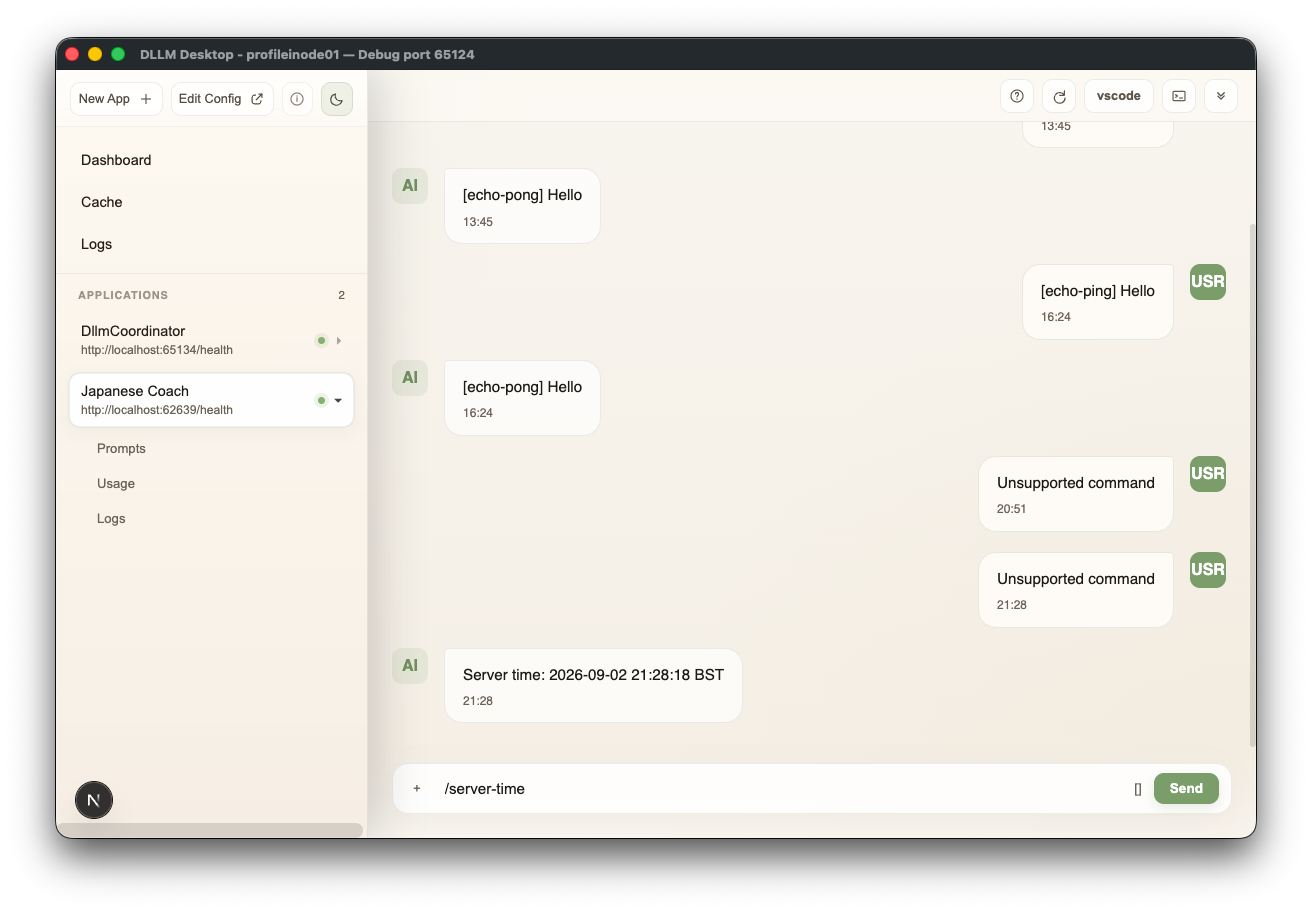
Return to Japanese Coach in DLLM Desktop and try the new command: /server-time. It fails with
Unsupported command because the running application is still using the
version last fetched from the repository, not the change that is only on your
computer.
13. Commit and push the reviewed change
Use your normal Git workflow to review the changed files, git add the files
you intend to publish, create a git commit, and git push it to the
repository. DLLM Desktop can then fetch the updated project when it restarts.
14. Restart Japanese Coach
In DLLM Desktop, select the restart ⟳ button. japanesecoach restarts in
a few seconds and loads the version you pushed. Then send the following
command in Japanese Coach:
/server-time
The server replies with its current time, confirming that the change is live.
15. Choose your next feature (optional)
The starter application has now completed its first change-and-restart cycle. From here, the tutorial is deliberately open-ended: return to Codex and describe the capability you want Japanese Coach to have. Codex can help you explore the project, propose an implementation, and make the changes; review its work before you commit and push it.
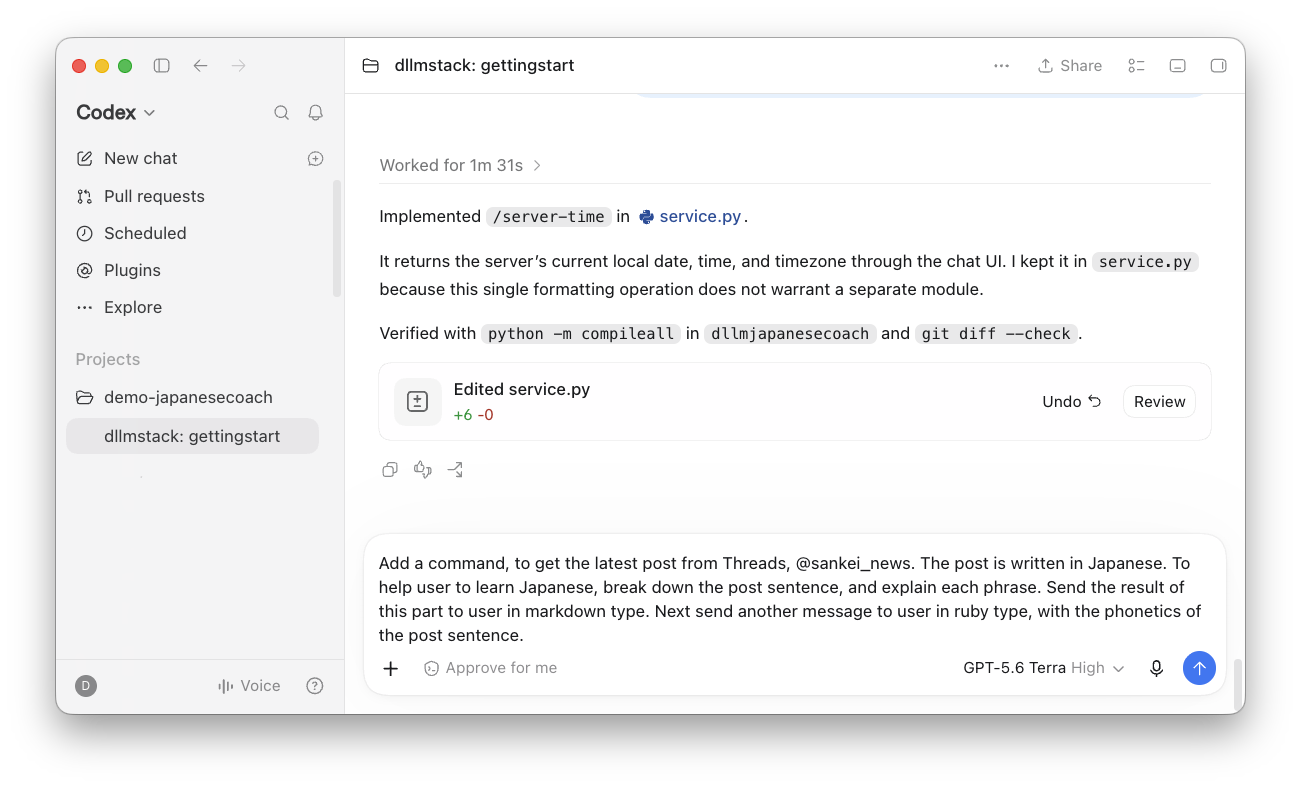
For example, you could ask Codex to turn Japanese Coach into a reading exercise for a Japanese news post:
Add a command to get the latest post from Threads, @sankei_news. The post is
written in Japanese. To help the user learn Japanese, break down the post
sentence and explain each phrase. Send the result to the user in Markdown.
Then send another message to the user in ruby format, with the phonetics of the
post sentence.
Use this as a starting point, then refine the request and the implementation with Codex to suit your own Japanese Coach. When you are satisfied with the result, follow the same review, commit, push, and restart cycle from steps 13 and 14 to make it available in DLLM Desktop.
Continue building
You now have a running DLLM application and a repeatable way to update it. Use these references as you develop your next feature:
- ChatTemplate documentation: understand the starter application you are extending.
- DLLM Desktop documentation: learn how the desktop shell manages your local applications and environment.
- Python API reference: explore the library's LLM interfaces and file-based prompt configuration when your application needs LLM calls.
- DLLM documentation MCP server: give your coding agent access to DLLM implementation documentation.